Posted: May 17th, 2010 | Author: jordan | Filed under: Kerberos, krb5, Linux, Mac OS X Server, Snow Leopard, SSH | 1 Comment »
This article is a pseudo continuation of the article: Using Network Accounts on a Linux Client with Open Directory Leopard Server. In this article I’m going to be going over at a high level the single sign-on environment in Mac OS X Server and at a low level on integrating Kerberized SSH and NFS and CentOS.
Please note the benefits of Kerberized NFS is that if a local computer is compromised the attacker will not be able to read NFS shares because they will not have a valid Kerberos ticket. Oh… and the whole NFS stream will be encrypted. (pow!)
Open Directory and Kerberos
 Taken from Apple’s site: Picture walking into the local county fair, and you are given two choices. You can either use your credit card at the entry of every ride or you can use it once at a booth, which grants you a ticket that you can use for the remainder of the day. It’s a pretty simple choice if you’re concerned about the security of your credit card information and want to have a hassle-free day at the park.
This is exactly what Kerberos accomplishes in its implementation of Single Sign On in network environments. At the beginning of the workday, a user enters his/her password into the system once; this action decrypts a ticket from a server running as a Kerberos Key Distribution Center (KDC). The ticket holds a set of encrypted keys, which are used throughout the day to authenticate user access without exchanging sensitive password information. It expires after a given amount of time (typically one day), so even if a would-be intruder sniffs it out and decrypts the information, the user-access information remains safe in the long term.
With your Kerberos ticket you can be granted password-less access to services across a multitude of platforms. You could be on your Mac client with a valid Kerberos ticket and authenticate to a Linux VNC server, or a Mac AFP/NFS server, or a simple SSH session. The possibilities are mind blowing!
As a side note: in this article the OD master will be referred to as foo and the linux client named lame with the domain of example.bar
Open Directory and Kerberos Setup
This article assumes your are somewhat of a valid Systems Admin and were able of getting your OD environment up and running without issue. If not please read: http://www.makemacwork.com/master-open-directory-1.htm
At a real high level here are the steps:
- set the hostname of your OD master
- in Server Admin turn DNS on and setup
- use `dig` to verify your forward and reverse DNS records to your OD master
- set Open Directory in Server Admin to `Open Directory Master`
- start binding clients
Extra tip and trick. In Server Admin -> Open Directory, there is an option I believe under Policy->binding that says something to effect of: Require authenticated binding between Directory and Clients. Enable this, then bind your Mac clients. What it will do when binding is ask for a username and password and computer record, enter your diradmin credentials and the FQDN of the host you are binding. For example, if your domain is example.bar and your client’s hostname is foo then enter: foo.example.bar
Kerberized SSH
For the Mac use /Applications/Utilities/Directory Utility to bind your Mac to the OD master.
On the Linux / CentOS side we’re going to setup Kerberos. First install kerberos with yum
sudo yum install krb5-auth-dialog krb5-devel krb5-libs pam_krb5-2.2.14-10 krb5-workstation
Now from the Gnome GUI go to System->Administration->Authentication
- Check, Enable LDAP Support
- Enter your LDAP search base and server address. Mine for this example would look like:

- If you don’t know your LDAP search base you can get it from the Overview Pane in Server Admin / Open Directory
- Click OK on this dialog box and then select the Authentication tab
- Check Enable Kerberos Support and click Configure Kerberos
- The realm should be the same as your LDAP search base in a different format, mine looks like this:
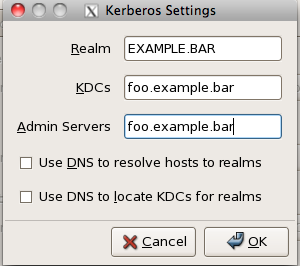
After binding your Mac and Linux clients let’s check to make sure it works. On either client type on the terminal kinit type in your password and then check to make sure you got your Kerberos ticket with klist. You should get the following response.
bart:~ jordan$ kinit jeunson

Please enter the password for jeunson@EXAMPLE.BAR:

bart:~ jordan$

bart:~ jordan$

bart:~ jordan$

bart:~ jordan$ klist

Kerberos 5 ticket cache: 'API:Initial default ccache'

Default principal: jeunson@EXAMPLE.BAR
Valid Starting Expires Service Principal
05/16/10 13:30:30 05/16/10 23:29:36 krbtgt/EXAMPLE.BAR@EXAMPLE.BAR
renew until 05/23/10 13:30:30
The command kinit is what is used to authenticate ourselves to the Kerberos Key Distribution Center (KDC) and grant us access to all Kerberized services. It is essential to have this ticket before proceeding.
Now that we know that Kerberos is working correctly we’re now going to setup Kerberized SSH. For your Mac and Linux clients we’re going to edit /etc/ssh_config or /etc/ssh/ssh_config depending on your Linux distro, you will want the following options set.
   GSSAPIAuthentication yes

   GSSAPIDelegateCredentials yes

   GSSAPIKeyExchange yes

   GSSAPITrustDNS yes
For the SSH server on the Mac side set the following options: /etc/sshd_config
GSSAPIAuthentication yes

GSSAPICleanupCredentials yes

GSSAPIStrictAcceptorCheck no

GSSAPIKeyExchange yes
KerberosAuthentication yes
KerberosOrLocalPasswd no
KerberosTicketCleanup yes
For the SSH servers on the Linux side set the following options: /etc/ssh/sshd_config
GSSAPIAuthentication yes

GSSAPICleanupCredentials no
KerberosAuthentication no
KerberosOrLocalPasswd no
KerberosTicketCleanup yes
Restart all SSHd services and make sure you have a fresh ticket from Kerberos.
Testing
First make sure you have a fresh new ticket using kinit and klist. Then try to ssh from your mac client to the Linux server or Mac server. It should let you in automagically. If not run ssh in ultra verbose mode to try and debug the problem. It’s usually comes down to some sort of DNS problem so make sure the Linux server you’re connecting to has DNS records for it and they resolve properly both forwards and reverse.
Kerberized NFS
First, you need to setup an NFS server on your Mac server. I’m not explaining how to do that. But I will say that you NFS mounts should be set to “Any” authentication setting for testing purposes. To learn more read the Apple server manual. 😛
DANGER!
First ensure that the client machine has a DNS record and is resolvable both forwards and reverse and ensure that the /etc/hosts file isn’t treading on the DNS records. Also before we proceed I must make it clear that you are very careful with this section. You will be connecting to the Kerberos Key Distribution Centre that is served inside of your Open Directory server. If you accidentally break something there is a risk that you will break your installation of OD and you will have to rebuild the whole Directory.
SSH in the linux host and check out a kerberos for the directory administrator.
[root@lame]# kdestroy

[root@lame]# kinit diradmin

Password for diradmin@EXAMPLE.BAR:

[root@lame]# klist

Ticket cache: FILE:/tmp/krb5cc_3001_7WM4As

Default principal: diradmin@EXAMPLE.BAR
Valid starting Expires Service principal
05/16/10 23:28:42 05/17/10 09:28:42 krbtgt/EXAMPLE.BAR@EXAMPLE.BAR
renew until 05/17/10 23:27:45
[root@lame]#
With this ticket you can now login to the KDC server. The following command references the file /etc/krb5.conf to locate the KDC server, it is then passed the -p switch with the name of principle to use when connecting.
/usr/kerberos/sbin/kadmin -p diradmin@EXAMPLE.BAR
From here on in, you must be very very careful. This is the Kerberos Key Distribution Centre. We’re going to be adding three principles to the KDC; host, root and nfs. The last one, nfs, requires a special option to make it works. Please make sure to type the FQDN of the linux client.
addprinc -randkey host/lame.example.bar@EXAMPLE.BAR

addprinc -randkey root/lame.example.bar@EXAMPLE.BAR

addprinc -randkey -e des-cbc-crc:normal nfs/lame.example.bar@EXAMPLE.BAR

Now lets copy those principals out of the KDC to the local file system

ktadd -k /etc/krb5.keytab host/lame.example.bar@EXAMPLE.BAR

ktadd -k /etc/krb5.keytab root/lame.example.bar@EXAMPLE.BAR

ktadd -k /etc/krb5.keytab -e des-cbc-crc:normal nfs/lame.example.bar@EXAMPLE.BAR

quit
Make sure this worked by reading the /etc/krb5.keytab file:
[root@lame]# sudo klist -k /etc/krb5.keytab

Password:

Keytab name: FILE:/etc/krb5.keytab

KVNO Principal

---- --------------------------------------------------------------------------

   4 host/lame.example.com@EXAMPLE.BAR

   4 host/lame.example.com@EXAMPLE.BAR

   4 host/lame.example.com@EXAMPLE.BAR

   4 root/lame.example.com@EXAMPLE.BAR

   4 root/lame.example.com@EXAMPLE.BAR

   4 root/lame.example.com@EXAMPLE.BAR

   4 nfs/lame.example.com@EXAMPLE.BAR

[root@lame]#
Now there are two daemons that need to be running to make kerberized nfs work. They are rpcgssd and rpcsvcgssd. To get this up we must edit the /etc/sysconfig/nfs file and uncomment the following lines:
MOUNTD_NFS_V3="yes"

SECURE_NFS="yes"
Then start up /etc/init.d/{rpcgssd,rpcsvcgssd} restart
Make sure to add them to the default run level
[root@lame]# /sbin/chkconfig rpcgssd on

[root@lame]# /sbin/chkconfig rpcsvcgssd on
Testing
Let’s try mounting a Kerberized NFS mount. First let’s make the folder /mnt/nfs Now issue a mount command.
sudo mount -t nfs -o sec=krb5p foo.example.bar:/Volumes/Data/Users /mnt/nfs

This "should" mount the NFS share on /mnt/nfs. Use the mount command again to see the krb5p option in action!

Some lines omitted

foo.example.bar:/Volumes/Data/Users on /Volumes/Data/Users type nfs (rw,nosuid,nodev,hard,intr,sec=krb5p,addr=10.10.10.10)
Tada! It Works! 😀
Posted: May 8th, 2010 | Author: jordan | Filed under: DNS, Free Geek, Insight, LDAP, Linux, Migrate, SSH, Vancouver | 2 Comments »

Free Geek Mascot #1
Today was awesome! We got so much done!!! And it all went without a problem… oh except for when we tried to create an LACP bond on our NFS server and crashed the whole network… yeah… Quick story on that. we have 10 VLANs all trunking between our switches and our router. The NFS server is on VLAN 5 untagged on port 17 on the switch, we the added port 18 and created a bond on the switch. We then created a bond0 interface on the NFS server and used ifenslave to assign the eth devices to the bond device. Then….
BAM! WHOLE NETWORK GOES DOWN. Not just vlan5, no no, the whole god damn network. No Internet access nothing, not even from the router, the router can’t ping a thing on the whole network.
Why God? Why?
Then the Network God ARP said, “Jordan did you check those top kwality DLink switches?” So off I went to check the switch I just modified. For some unknown reason the DLINK decided to plunk VLAN 6 tagged onto port 16 for no reason what-so-ever. So I fixed that, but no, nothing worked still. So Tyler says, just unplugg the ethernet cables to the NFS server. Voila! Problem solved. Basically we think the NFS was just spewing out crap across the network and making all the servers in VLAN 5 bail, including the router. We were getting some pretty crazy ARP poisoning happening the router. Now, on to the good stuff.

This is a basic (and poorly made) diagram of how the Free Geek Vancouver network looks. We’ll take a look at how an LTSP client boots and logs in.
First the LTSP client boots looking for a PXE server, DHCP is handed out and tells the client to grab a boot image from yew. The LTSP client then boots into Ubuntu 10.04 (bleeding edge baby) where the login screen is presented. The user logs in and authenticates against our new fancy LDAP server on teak. When the client logs in their home directory is handed out via LDAP as /net/home/<$user> This directory is handled by AutoFS and mounts the NFS home from maple. The user now has full desktop experience with all their account info and home directory handled by 3rd parties.

What? Centralized authentication AND home directories?! REALLY?
Our LTSP server is now a 2 x Dual Core Xeon 3.20GHz with 4GB of RAM. A HUGE upgrade from what we running before. In addition to all this insanity Vicki was able to migrate our ticketing system for us as well as update all the LDAP records for home directories, install autofs on all servers, install the mount maps, comment out all the irrelevant fstab crap AND switch over all our servers to the LDAP server. Pow vicki, pow!
The backup system is pretty sweet as well. In our NFS server that holds the home directories is two RAID 5’s, a RAID 1 and some spares. One RAID 5 has a slice out of it that is for home directories. The other is 1TB for nothing but backups. What Tyler did was write a script that uses rsync to create incremental backups all done thru hard links. It’s pretty rad.
Now that I come to think of it, I didn’t really do much except play with the dogs!!
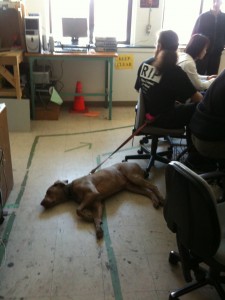
She helped in her own way

What's going on?
Posted: May 4th, 2010 | Author: jordan | Filed under: Free Geek, LDAP, Linux, SSH | 2 Comments »
Yes, yes, I know. Two months have gone by since the last entry about Free Geek. Well finally I had some time to make it down there and to my enjoyment though Tyler from Free Geek had been busy at work. He managed to do quite a bit of work while I was away. Here’s a pic and some highlights!
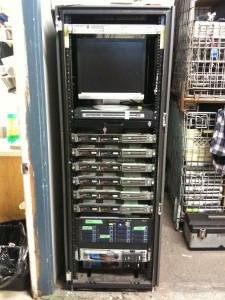
Front of Rack
Now first I must mention something that happened which was spectacular. I showed up to Free Geek with tools in hand ready to kick ass and chew bubblegum. I said ‘Hi’ to the gang and then got right to work going over what’s been done already and what we should do for the day. Then I heard a small voice coming from behind me. It all started with a simple ‘Hello.’ Tyler and I turned around and here stood this lady, she said that she had heard we were doing updates to the network and wondered if she could help. I have something to confess here, I judged at first sight. So my initial response was ….. uhhhhhh….. and in my head I was thinking “oh god I have SO much to do today, I can’t possibly teach and babysit someone else.” However we said ok you can help
“what’s your name?” I asked
“Vicki” she replied.
I said “OK, Vicki, I’m going to outline on this whiteboard what we hope to accomplish today.”
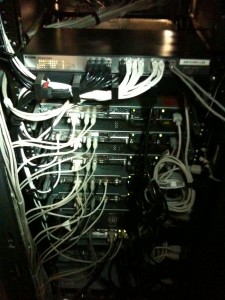
Damn! That's nice wiring!
I then began drawing out network topologies and what VLAN’s we were going to roll out that day. Tyler pulls up a network diagram I had done up briefly a few weeks ago to talk about subnet allocation and service assignments. All the while Vicki was quietly watching and listening. We then went about which of our new servers would be responsible of what task, such as “teak” was going to be our new LDAP and DNS server, maple the new NFS server, how authentication was going to happen for autoFS mounts and so on. Granted if you’ve been in this industry for a while this isn’t super complex stuff, LDAP migration, network topology planning, thinking ahead for future departments, etc etc. However, this isn’t childs play either, let’s be honest there are a lot of ‘sys admins’ out there and not all of them could roll out a network of this size.
We turned to Vicki and started going thru the tasks on the board, expecting (I was anyway) to see a lot of confusion. BUT NO! OMG! She knew just as much, if not MORE about this stuff than we did. In fact, over lunch we got into a discussion about proper use of VLAN’s and subnet routing between them. This woman was (is) AMAZING! It was like the network God looked down from heaven and with his noodley appendage, blessed our tech mecca for that day by sending us a worker! A worker that new how to install services, write config files, test connectivity and map VLAN’s!!! Quite literally she cut our work time by 40% if not more. If anyone needs a good sysadmin, or network engineer who knows their way around a linux terminal and learns by being shown ONCE! Contact me, I’ll send her details on to you.
Anywho, Tyler and I laid out the VLAN’s and what they would be responsible for. We had configured three switches thus far to trunk all the VID’s but when we got to the fourth and final switch, we had no admin credentials for it. (My fault!) Our plan at that point was to wait until the end of the day, reset the switch, recover the password and then move our core router to the rack. In the meantime I checked up on Vicki and she had gotten all of our services, OpenLDAP, bind, Zenoss, apt-cache, TFTP server, and some other stuff up and running and was ready for configuration. I migrated the database from an older version of OpenLDAP with a slapd.conf file to the new version with the slapd.d directory.
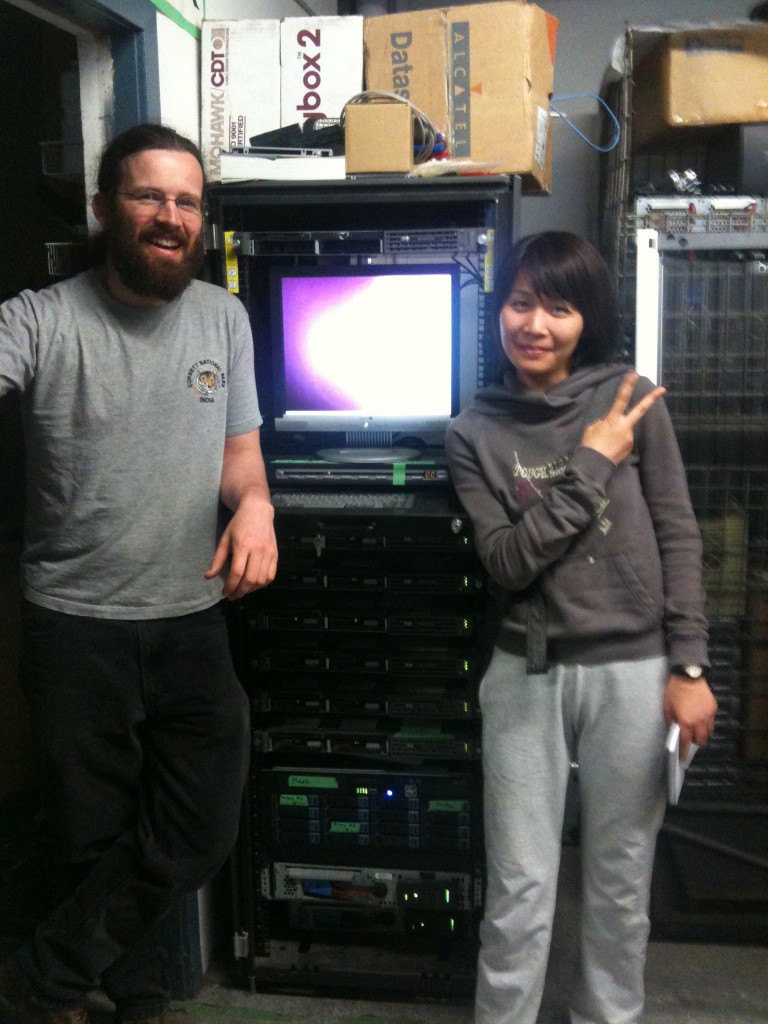
Tyler and Vicki (Respectively)
Once the Free Geek came to an end Tyler and I moved the router from the bathroom server room to the upstairs rack, pushed the ADSL modem thru and VLAN, and then made an LACP trunk to our OpenBSD router. Put the VLAN interfaces in place and POW. Network configured. (For the most part) The final stage is migrating the servers to the proper VLAN’s and updating their services configurations.
The next and final post will be mostly diagram based. Stay Tuned! HOPEFULLY the next post will be really insightful IF I can get Luke and Kamil from Zymeworks to donate some time into rebuilding our Asterisk server and implementing a KDC
Posted: November 26th, 2009 | Author: jordan | Filed under: SSH | 2 Comments »
So you’re in your favorite coffee shop cruising the net and doing some work. You’re downloading email and doing you thing. What some of you may not realize though is that you are broadcasting your data in the clear. Which means that anyone sitting close to you with a few simple tools can see everything you’re transmitting and receiving. I’m going to show you how to secure your data by encrypting it with an SSH tunnel.
Now this is one of my favorite tricks out there because you can not only encrypt your data but also redirect your Internet connection. Thus you can obscure your IP address and also because of GeoTracking can mask your country of origin. This is particularly useful when trying to watch content on a site and the site mistakenly thinks that you are not in the country you claim to be. Or if you’re behind a corporate firewall that blocks web access and you want to get a connection to the outside world.
What we need for this demonstration is two things, a: server capable of allowing SSH connections and b: Mozilla Firefox. Now you can use Safari but I find that Firefox works more consistently. If you do not have access to a server that allows SSH connections such as a web hosting provider you can use any of the services listed on the bottom of the screen. (http://www.red-pill.eu/freeunix.shtml)
First open your terminal application and type in the following command. ssh -D 8080, first the D flag states that the SSH connection Specifies a local “dynamic” application-level port forwarding. You can specify a bind address but since we’re leaving this blank it’s going to bind to the loopback address of the local computer. This works by allocating a socket to listen to port on the local side. The 8080 is the local port that we’re going to be using. Then we’re going to add the -Cfq and N switches. C requests tcp compression, f for sending ssh into the background, and q for quiet mode. The last switch N is what allows this to all be possible, it tells the ssh server to not execute any remote commands, such as bash and to just stay open. We then specify the SSH server that we’re connecting to, in this case it will be my very own webserver macandcheese.org
enter your password and you’re done.
Next, open Mozilla Firefox. In the url bar type in about:config. This is all the configuration options for Firefox, the ones we’re after are to do with proxies. So in the filter box enter “proxy” and hit return. You’ll notice a number of different settings here. The first one we’ll want to change is network.proxy.socks, we’re going to change this to our loopback address 127.0.0.1 this is the address that our SSH tunnel is bound to. Second network.proxy.socks_port change to 8080 which is the bind port specified earlier. Third we want to change the network.proxy.socks_remote_dns to true.
Now that we’re done those options Firefox is configured to connect via an SSH tunnel, aka a proxy. But it’s currently not using it, we can it on by switching the last option to 1 instead 0 and likewise when we’re finished with the tunnel can switch it back to 0.
I’m going to now open a connection to whatismyipaddress.com in Firefox which is hooked into our remote tunnel and then another connection using Safari. Noticed the how the IP address are different. This is because Safari is using my local IP where Firefox is using my hosting providers IP.
As another example of how you can pipe an application’s internet connection through an ssh tunnel we’re going to use Adium and connect to my msn and aol accounts. Just open Adium, then preferences, click on the account and go to proxies. Enter again the localhost and port 8080 and select SOCKSv5 proxy. You can use this trick with any application that will allow you to use a proxy. Now any chats I send and receive while here are encrypted.
Hope that helps!
 Taken from Apple’s site: Picture walking into the local county fair, and you are given two choices. You can either use your credit card at the entry of every ride or you can use it once at a booth, which grants you a ticket that you can use for the remainder of the day. It’s a pretty simple choice if you’re concerned about the security of your credit card information and want to have a hassle-free day at the park.


